Green Screen Setup for Remote Work: Complete Home Office Guide
Build a clean green screen setup for video calls with the right backdrop size, even lighting, camera placement, software settings and fixes for common keying problems.
What to know first
- Buy for your workflow and connection needs, not headline specifications.
- Reliability and warranty often matter more than a minor speed gain.
- Check compatibility before committing to an accessory.
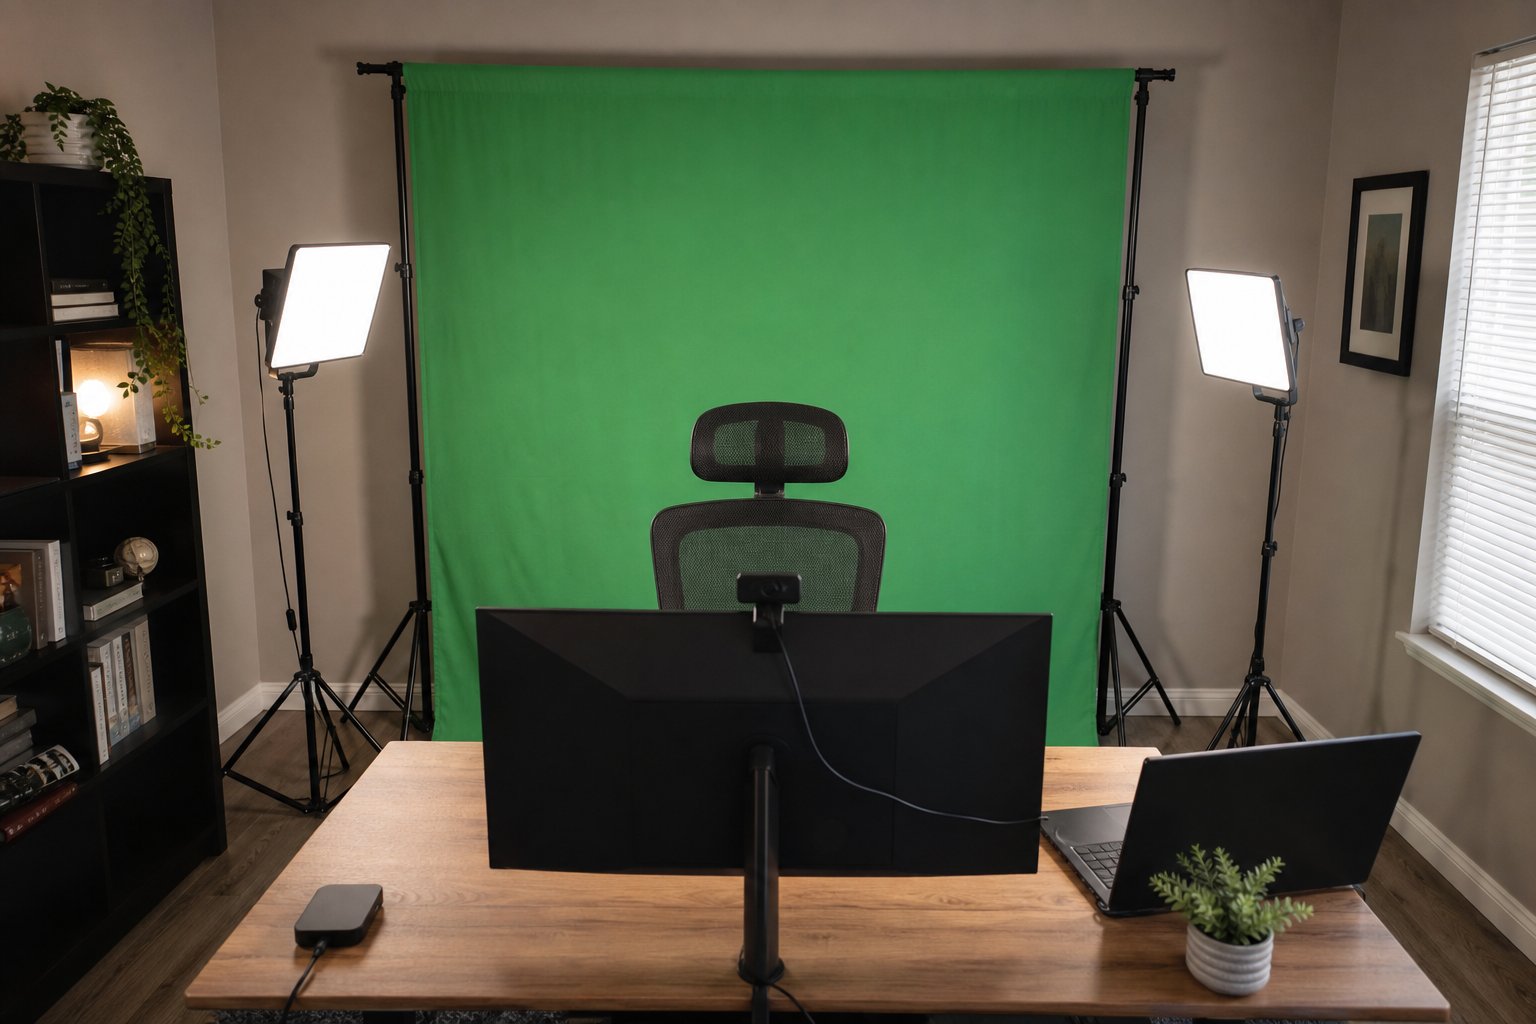
A clean green screen setup for remote work needs four things: a smooth matte backdrop, separation between you and the screen, even light on the green surface and separate light on your face. Software cannot rescue heavy wrinkles, shadows or a webcam that constantly changes exposure.
You may not need a green screen for ordinary calls. A calm real background is faster and more natural. Use chroma key when privacy, branded presentations, training video or consistent client-facing production justifies the extra setup.
What you need
| Component | Purpose | Budget approach |
|---|---|---|
| Matte green backdrop | Provides a distinct key color | Fabric or collapsible panel |
| Stable support | Keeps backdrop smooth and safe | Stand, frame or rated wall mount |
| Two soft backdrop lights | Creates even green exposure | Matched LED panels or diffused lamps |
| Face light | Separates your exposure from backdrop | Window, soft panel or ring light |
| Camera | Captures clean edges and color | Existing webcam in good light |
| Software | Removes the selected color | Meeting app or broadcast software |
Do not buy a camera first. Lighting and backdrop quality usually produce the larger improvement.
Choose the right green screen type
Fabric backdrop
Fabric is affordable and available in large sizes. It needs tension or steaming to remove folds.
Choose matte fabric with a saturated, even green. Thin material may reveal windows or wall patterns behind it.
Collapsible panel
A spring-frame panel opens quickly and stores flat or folded. It stays smoother than loose fabric and suits a chair-height camera frame.
Confirm it covers the full camera view, including the sides when you move.
Pull-up floor screen
A pull-up screen stores in a floor case and creates a fast consistent background. It uses floor depth and can be expensive, but pack-down is excellent.
Chair-mounted screen
A small screen attaches behind the chair. It is portable but often leaves uncovered corners when you lean or use a wide camera angle.
Painted wall
A dedicated matte wall creates the smoothest permanent surface. It sacrifices the room and requires even paint color, preparation and lighting.
How large should the screen be?
Frame the camera first. Sit in the widest position you will use and include hand gestures. The green area must cover every pixel behind your outline.
For a seated head-and-shoulders call, a compact collapsible screen may work. For standing presentation, demonstrations or a wide camera, use a full-width backdrop that extends to the floor.
Crop the camera view rather than buying an enormous screen when the room is small. A slightly tighter professional frame usually looks better than a wide view of lighting stands and ceiling.
Position the backdrop
Place the screen 1 to 2 meters behind you when the room allows. Greater separation reduces green color reflected onto hair and shoulders and makes your shadow easier to keep off the screen.
In a smaller room, create as much distance as practical and use softer, more controlled lights. Do not push the chair against the fabric.
Keep stands outside walkways. Add manufacturer-recommended weights to floor stands and secure cables. Do not create a tip hazard behind a rolling chair.
Remove wrinkles and texture
Wrinkles create bright and dark areas that require aggressive software settings.
For fabric:
- Hang it with the correct side facing the camera.
- Tension from top and sides using appropriate clamps.
- Use a garment steamer only if the manufacturer permits it.
- Keep hot equipment and moisture away from electronics.
- Let the material dry completely.
Do not iron unknown synthetic fabric at high heat. A collapsible or pull-up screen is easier when daily steaming is unrealistic.
Light the green screen evenly
Use two matching lights, one on each side, aimed across the backdrop rather than directly at its center. Keep both at similar height and distance.
The goal is not maximum brightness. It is a consistent green value from side to side. Use a camera preview or software scope where available to identify hotspots.
Move lights farther away for a more even spread if the room permits. Add diffusion designed for the fixture. Do not clip paper, fabric or improvised material to hot lamps.
Light your face separately
After the green surface is even, add a face light near the camera and slightly above eye level. This lets you adjust your appearance without changing the background exposure.
A window can be the face light if calls occur at a predictable time. For consistent recording, use a dimmable soft LED source.
Avoid strong green spill from the backdrop. Move forward, reduce background brightness or add a neutral rim light behind and to one side if the production needs it.
Set the camera
Place the lens near eye level and far enough away for a natural perspective. Use moderate framing from chest or shoulders upward.
Where the camera allows manual control:
- Lock white balance after lighting is set.
- Lock exposure so the image does not pulse when you move.
- Use the lowest practical noise level.
- Keep shutter settings compatible with local lighting frequency when flicker appears.
- Focus on the eyes.
Automatic settings are acceptable for ordinary calls, but they may shift the green color when clothing or slides change.
Choose clothing carefully
Do not wear the same color as the backdrop. Green clothing, accessories or reflections can disappear.
Fine patterns, translucent fabric and reflective jewelry create difficult edges. Choose solid colors that contrast with green and the intended virtual background.
Hair with flyaways and transparent objects require more careful lighting and higher-quality keying. Do not increase software aggressiveness until the setup is as clean as practical.
Configure Zoom, Teams or Meet
Most meeting platforms offer background replacement, but controls and hardware requirements change.
General process:
- Open video settings before the call.
- Select a virtual background.
- Enable the option indicating a physical green screen, if available.
- Use the color picker on a midtone green area.
- Adjust crop and lighting before joining.
- Test hand movement and chair motion.
The platform may compress video heavily. A subtle static background survives compression better than animation or detailed graphics.
Follow employer policy before uploading branded or client material.
Use OBS for more control
Open Broadcaster Software can apply a chroma-key filter, compose layouts and output a virtual camera to compatible meeting applications.
A basic workflow:
- Add the webcam as a video source.
- Add a chroma-key filter.
- Select green and adjust similarity carefully.
- Reduce spill only as much as needed.
- Add the replacement image beneath the camera layer.
- Start the virtual camera.
- Select that camera in the meeting app.
More processing increases system load. Test CPU or GPU use, audio synchronization and camera availability before an important meeting.
Fix common green screen problems
The edges shimmer
Increase backdrop light consistency, reduce webcam noise and avoid very aggressive key settings. More light on the face may allow a cleaner camera exposure.
Hair disappears
Increase distance from the screen, reduce green spill and refine similarity or spill suppression. A subtle back or rim light can improve separation.
The background has holes
Smooth wrinkles and shadows. Sample a representative green area and reduce hotspots before adjusting software.
Hands vanish during gestures
Check whether skin is underexposed or reflecting green. Improve face and hand lighting, move away from the backdrop and reduce compression where settings allow.
Glasses reflect green
Increase distance, change face-light angle and avoid lighting the green surface more brightly than necessary.
The virtual background looks soft
Use an image matching the camera output aspect ratio and at least the required platform resolution. Avoid tiny text and fine patterns.
Green screen vs background blur
Use blur when you need privacy with no setup and the software separates you reliably. Use a real background when trust, natural edges and simplicity matter. Use green screen when a clean replacement, brand set or instructional composition justifies the equipment.
A physical screen is not automatically more professional. Wrinkled green fabric with visible gaps looks worse than a tidy wall.
A budget setup plan
Starter: matte fabric, stable support, two existing diffused lamps and a window or desk light for the face.
Reliable: collapsible screen, two matched dimmable panels and one soft face light.
Production: pull-up or permanent backdrop, controlled three-point subject lighting, manual camera and OBS composition.
Buy in stages. Test the existing webcam before upgrading it.
Finish the video-call workstation
A green backdrop solves only the background. Use the ring light guide to refine face lighting and the complete home office guide to check camera height, sound and cable safety.
Final checklist
- The backdrop covers the complete frame.
- Fabric is smooth and matte.
- You sit as far from it as the room permits.
- Background light is even.
- Face lighting is separate.
- Camera exposure and white balance are stable.
- Clothing does not match the screen.
- Stands and cables are secured.
- Software settings are tested before the call.
- The replacement image contains no confidential or misleading context.
A professional green screen comes from clean physical setup, not extreme software filtering. Smooth the surface, separate subject and backdrop, light each independently and keep the virtual scene simpler than you think it needs to be.