Multiple Monitor Setup: How to Arrange 3 or 4 Screens
Plan a multiple monitor setup with three or four screens. Check laptop support, choose a layout, calculate desk space and avoid neck, bandwidth and cable problems.
What to know first
- Start with the work you do, not the look you want.
- Protect clearances before choosing furniture.
- Spend first on items you touch for hours each day.
A useful multiple monitor setup assigns one purpose to each screen and keeps the highest-use display centered. Three or four monitors add value for dashboards, timelines, monitoring and reference-heavy work, but they also increase head turning, graphics load, cable complexity and desk depth.
Before buying another display, confirm the computer can drive the required count, resolution and refresh rate. More ports on a dock do not automatically mean more supported monitors.
Quick layout guide
| Workflow | Recommended layout | Center position |
|---|---|---|
| Main task plus two references | Three side-by-side | Main display |
| Coding or writing | Two landscape plus one portrait | Active editor |
| Wide timeline or design | Ultrawide plus one side screen | Ultrawide |
| Operations dashboards | 2 × 2 grid | Lower primary screen |
| Laptop plus two monitors | Two externals centered, laptop aside | Main external |
| Frequent video calls | Camera on meeting display | Call screen |
A third screen should have a named role. Otherwise it often becomes a permanent inbox.
Step 1: confirm display support
Check the exact computer model and processor, not only the operating system or laptop family.
Record:
- Maximum number of external displays
- Maximum resolution at each count
- Supported refresh rates
- Limits with the laptop lid open or closed
- Thunderbolt, USB4 or DisplayPort Alt Mode support
- HDMI or DisplayPort version
- MST support
- DisplayLink driver policy
Apple Silicon Macs vary significantly by chip generation and tier. Windows laptops can also route ports through different graphics hardware.
Our docking-station guide explains native outputs, MST and DisplayLink.
Native displays vs DisplayLink
Native display output
The GPU sends video through HDMI, DisplayPort, USB-C or Thunderbolt. This is best for high refresh rates, color-sensitive work, protected video and low latency.
DisplayLink
DisplayLink compresses graphics and sends them over USB with software. It can add screens beyond a computer’s native output count.
It works well for documents, dashboards and many office applications, but may introduce limitations for:
- Gaming
- High-frame-rate video
- Color-critical production
- Protected content
- Managed systems that block drivers
- Screen recording or permission controls
Ask IT before using a software-driven dock on an employer device.
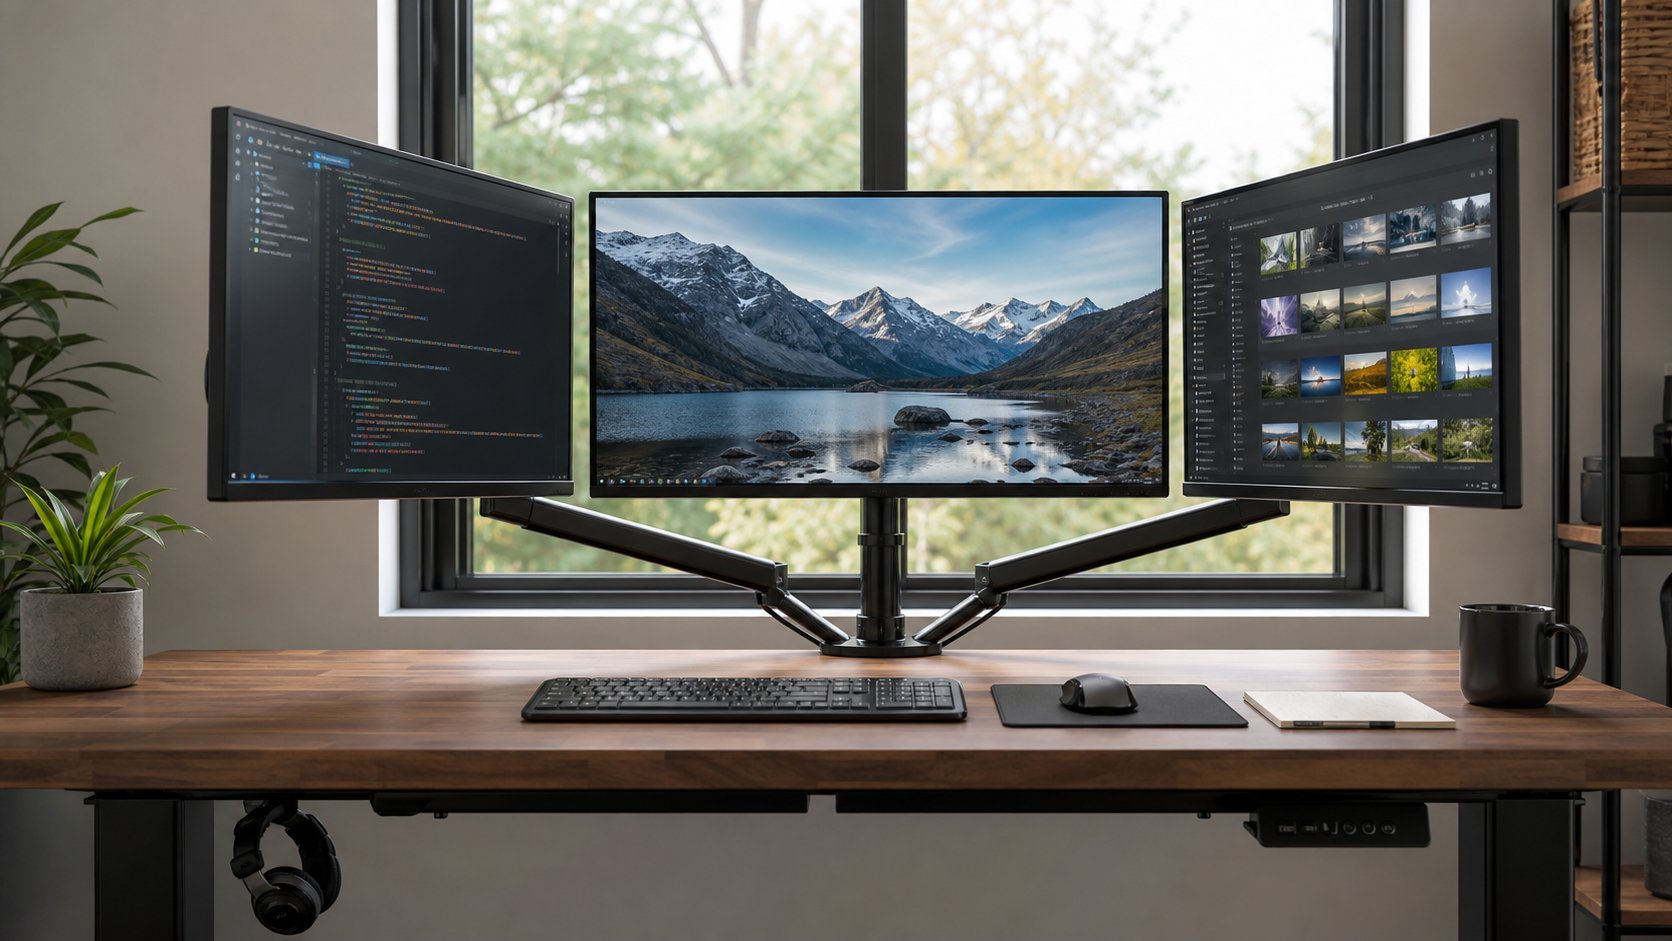
Three-monitor layout 1: centered landscape row
Put the primary monitor directly ahead. Angle the left and right displays inward so their near edges sit close to the primary.
Best for: analysis, development, writing with references and ordinary multitasking.
Advantages: simple mental map and equal side access.
Watch for: excessive total width and repeated far-side head turns.
Keep high-frequency applications near the inner edges of side displays. Put occasional dashboards farther out.
Three-monitor layout 2: portrait side screen
Use one centered landscape display, one angled landscape reference display and one portrait monitor for long documents, code, chat or page previews.
Best for: editing, development and legal or research work.
Advantages: vertical content uses less horizontal desk width.
Watch for: a tall portrait screen can force upward viewing. Align the central viewing area, not necessarily the physical top edges.
Confirm the panel and stand support rotation. Some displays have poor viewing quality in portrait orientation.
Three-monitor layout 3: stacked secondary
Place the main screen at normal height and a low-priority dashboard above it.
Best for: monitoring information viewed briefly.
Advantages: saves horizontal space.
Watch for: neck extension. Do not put the primary task on the upper monitor.
Angle the upper display downward and reserve it for glances. If you look up continuously, redesign the layout.
Four-monitor layout 1: 2 × 2 grid
Two displays sit below and two above.
Best for: control rooms, finance, support queues and operations monitoring.
Center the seam between lower monitors only when both are used equally. Otherwise center one lower primary display and let the grid become asymmetrical.
Upper screens should display low-interaction information. A deep desk and strong mount are usually required.
Four-monitor layout 2: three plus laptop
Use three external screens for active work and the laptop for communication or system status.
Best for: laptops that support the total display count and desks with sufficient depth.
Place the laptop on a stable stand at one side. Do not reach to its attached keyboard; use one external keyboard and mouse.
The laptop screen can be closed if the computer supports clamshell operation, ventilation remains adequate and an external camera or microphone replaces anything lost.
Is an ultrawide better?
An ultrawide offers a continuous canvas with fewer bezels and cables. Multiple monitors provide physical separation and more flexible orientation.
Choose an ultrawide when:
- Two or three windows need a continuous horizontal surface.
- One connection is easier for the laptop.
- Seamless timelines or spreadsheets matter.
- A centered camera can mount above one panel.
Choose separate displays when:
- Full-screen applications need boundaries.
- A portrait screen is useful.
- Screens require different inputs or color profiles.
- Gradual upgrades fit the budget.
One very wide curved display can still require head movement. Width does not eliminate ergonomics.
Calculate desk width
Add the visible width of all landscape screens, then reduce the total for angled overlap.
Example:
- Three 27-inch 16:9 monitors are each roughly 60–62 cm wide including bezel.
- Straight-line width approaches 180 cm.
- Angling side displays can reduce the footprint, but depth increases.
Do not assume three 27-inch displays fit comfortably on a 120 cm desk.
Measure:
- Desktop width
- Desktop depth
- Wall clearance
- Arm reach
- Speaker and lamp space
- Mount clamp area
- Chair path
Tape the approximate footprint before ordering.
Choose matching or mixed monitors
Matching monitors simplify alignment, color, resolution and scaling. Mixed displays can save money and assign different roles.
When mixing, compare:
- Pixel density
- Operating-system scaling
- Brightness and white point
- Bezel size
- VESA pattern
- Port type
- Stand height
- Refresh rate
A low-resolution side screen beside a high-density main display can make cursor and text sizes feel inconsistent.
Monitor arm requirements
A multi-monitor arm must support the weight and VESA pattern of every display.
Check:
- Weight without the original stand
- VESA dimensions
- Arm capacity per position
- Maximum horizontal reach
- Tilt strength
- Clamp opening
- Desktop material and thickness
- Wall clearance
Independent single arms often provide better adjustment than one triple crossbar. A combined arm can align matching monitors efficiently but transfers more leverage to one clamp.
Do not clamp heavy arms to a hollow or damaged desktop without manufacturer approval. Reinforcement plates distribute load but cannot make an unsuitable surface safe.
Set monitor height and distance
Center the most-used display directly ahead. Begin with its top around eye level or slightly below, then adjust for size, distance, task and eyewear.
Place side screens close enough that a modest head turn reaches their central content. Do not force the eyes to the far edge repeatedly.
OSHA’s workstation guidance recommends facing the main screen and avoiding prolonged side viewing. Use the monitor-height guide for a complete setup.
Manage resolution and refresh rate
Four 4K displays require much more bandwidth than four 1080p displays. A dock may support one 4K screen at 60 Hz but reduce refresh rate or USB speed when more displays are added.
Check the complete combination, not each port separately.
For office work, a stable 60 Hz connection is usually the minimum comfortable target. Higher refresh can improve motion but increases bandwidth.
Use certified cables of suitable length and specification. Adapters add another compatibility point.
Cable the system
- Label each cable by monitor and input.
- Connect the primary display through the most reliable native path.
- Test every screen before routing cables.
- Leave service slack at monitor arms.
- Keep power and data connectors accessible.
- Separate cable weight from laptop ports.
- Save the final display arrangement in the operating system.
If the desk moves, test cables at full height and full arm extension.
Create a screen map
Assign persistent roles:
- Center: active work
- Left: source material or communication
- Right: preview, output or secondary reference
- Upper: passive monitoring only
Use virtual desktops to reduce clutter within each physical display.
Do not keep confidential chat or client data visible on an outward-facing screen.
Performance troubleshooting
One screen stays dark
Verify the computer’s display limit, correct input, cable direction and dock requirements.
Resolution drops
The host link may lack bandwidth. Lower refresh, use a native port or separate displays across approved outputs.
Displays rearrange after sleep
Update graphics and dock firmware, use consistent ports and wait for the dock to initialize before opening applications.
Mouse movement feels uneven
Match display arrangement and scaling in system settings. Align the virtual edges to the physical layout.
Laptop runs hot
Multiple displays increase graphics demand. Keep vents clear and use the correct power adapter.
Common mistakes
Buying screens before checking the host. Port count is not display support.
Centering a bezel used constantly. Center the primary screen unless both sides truly share attention.
Putting active work above eye level. Reserve high monitors for glances.
Using one overloaded arm clamp. Verify desk and mount limits.
Mixing arbitrary scaling. Cursor and window movement becomes frustrating.
Adding screens instead of reducing notifications. More surface can create more distraction.
Final recommendation
For most three-monitor setups, center one landscape display and angle two side screens inward. Use portrait orientation when vertical content has a clear role. For four monitors, keep primary work on the lower level and passive information above.
Confirm GPU and dock support before buying, measure the full footprint and protect the centered viewing position. A multiple monitor setup succeeds when each screen has a job—not when every available port is filled.