LED Desk Lighting Guide: Build a Better Three-Layer Setup
Plan safer LED desk lighting with ambient, task and background layers, plus practical guidance on glare, color appearance, strip mounting, power and controls.
What to know first
- Start with the work you do, not the look you want.
- Protect clearances before choosing furniture.
- Spend first on items you touch for hours each day.
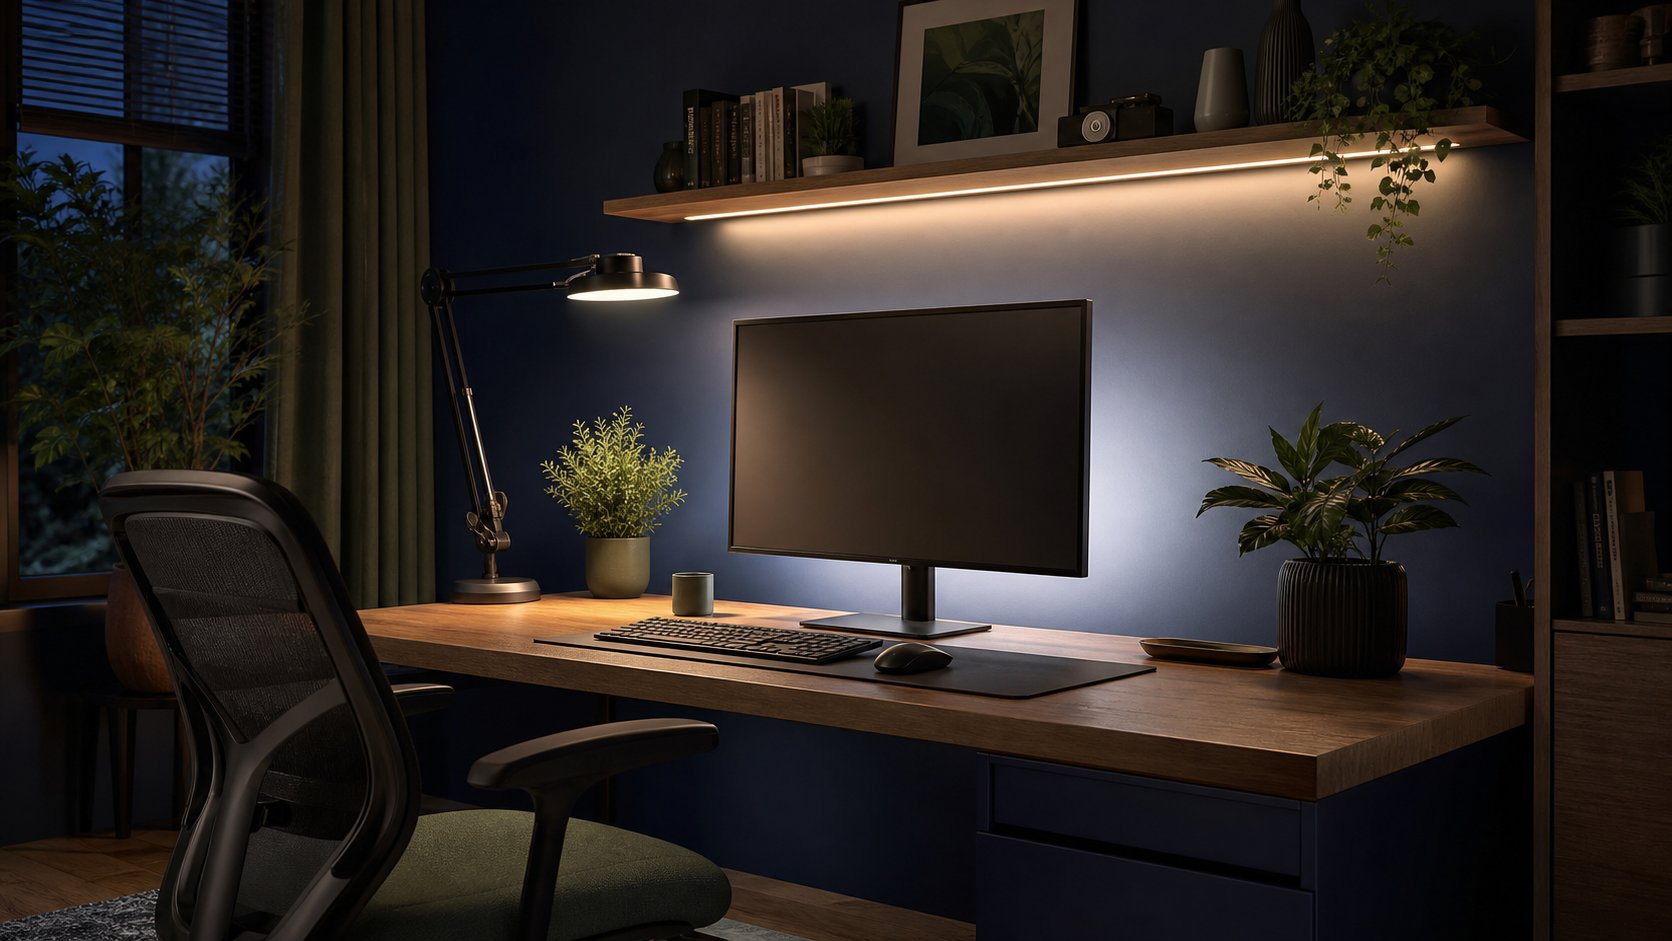
A useful LED desk setup has three restrained layers: general room light, an adjustable task light for paper and keyboard work, and low-output background light that reduces the contrast between a bright screen and a dark wall. Decorative color should be optional and dimmer than the working light.
Start by fixing glare and fixture placement. More lumens do not automatically create better visibility, and a bright strip in direct view can make the workspace less comfortable. This guide addresses layout and product selection, not medical treatment or electrical installation.
The three-layer plan
| Layer | Job | Good starting position | Common mistake |
|---|---|---|---|
| Ambient | Make the room safely visible | Ceiling or reflected room light | One harsh fixture behind the screen |
| Task | Light paper and controls | Side opposite the writing hand | Bare source reflected in monitor |
| Background | Reduce screen-to-wall contrast | Hidden behind monitor or shelf | Visible LED dots at full output |
Accent color is a fourth optional layer. It should not replace white task light.
Layer 1: ambient room light
Ambient light keeps the room, floor and storage visible. Use a diffused ceiling fixture, shaded floor lamp or reflected wall light rather than one exposed high-intensity source.
The goal is evenness. A bright monitor in an otherwise black room creates a large contrast; a bright ceiling lamp reflected in the display creates glare. Adjust the room and screen together.
The US Department of Energy’s consumer lighting guide explains that lumens measure brightness while watts measure electrical power. Buy by required light output and quality, not by assuming higher wattage is brighter.
Layer 2: task lighting
A desk lamp should illuminate paper, keyboard controls or detailed work without shining into the eyes or screen.
For right-handed writing, place it toward the left; reverse for left-handed work. Raise or widen the source until the hand casts a soft, manageable shadow.
Look for:
- Dimming that remembers a stable setting
- A shade or diffuser
- An arm that stays in position
- A base or clamp compatible with the desk
- Replaceable lamp or credible warranty
- An accessible physical control
Avoid placing a heavy clamp on glass or a weak hollow desktop.
Layer 3: monitor background light
A low-output white strip or lamp behind the monitor can make the wall less dark. Hide the source so only reflected light is visible.
This is often called bias lighting, but casual home-office use does not require a cinema reference system. For color-critical editing, use an appropriate neutral product and calibrated workflow rather than decorative RGB.
Mount the strip so it:
- Does not block ventilation
- Does not cross moving monitor-arm joints
- Cannot pull on ports
- Is removable without damaging the display
- Reflects from a neutral wall where color accuracy matters
Do not wrap high-output strips tightly or cover components that require heat dissipation.
Optional accent lighting
A warm shelf strip or restrained color wash can separate the workspace visually from the room. Keep it outside the direct line of sight and below task-light brightness.
Use color for atmosphere, not to signal unsupported health or productivity effects. If saturated light makes text, skin tones or objects hard to judge, turn it off during work and calls.
Choose color appearance
Correlated color temperature is measured in kelvin. Lower numbers look warmer; higher numbers look cooler. It does not measure brightness.
Practical starting points are:
- 2700–3000 K: warm evening ambience
- 3000–4000 K: neutral-to-warm general office light
- 4000 K and above: cooler appearance for some daytime or detailed tasks
There is no single medically correct number for everyone. Match fixtures so the room does not look patchy, and choose tunable white only if you will use it.
For video calls, light the face with a neutral source and set the camera’s white balance consistently. The video-call setup guide provides placement details.
Color rendering and flicker
Color rendering describes how naturally a light reveals colors compared with a reference. Higher-quality light can matter for artwork, product samples and video.
Flicker performance is harder to judge from a phone video alone because cameras and dimmers interact. Buy from a traceable manufacturer that publishes compatibility and warranty information. Return a product that causes visible instability, buzzing or discomfort.
Do not assume every “flicker-free” marketplace claim has been independently verified.
Prevent glare
OSHA’s monitor guidance recommends arranging displays to avoid glare from windows and lights.
Work through this order:
- Turn the screen perpendicular to the strongest window.
- Use blinds or a sheer curtain.
- Move exposed bulbs out of the reflection path.
- Add a diffuser or shade.
- Match screen brightness to the room.
- Clean the display.
A brighter monitor is not a fix for a badly placed lamp.
Select LED strips carefully
LED strips differ in voltage, density, color accuracy, adhesive, cut points and controller compatibility.
Check:
- Listed input voltage and power supply
- Maximum permitted run length
- Approved cut marks
- Connector rating
- Indoor or damp-location suitability
- Dimming method
- Controller privacy and network needs
- Replacement availability
Use only the supplied or manufacturer-approved power supply. A connector that physically fits may have the wrong voltage, polarity or capacity.
USB lighting is still electrical equipment
A USB strip can exceed the intended load of a monitor or hub port. Check the port’s documented output and the light’s required input.
Do not:
- Daisy-chain unverified USB adapters
- Hide hot power bricks under felt
- Pinch a cable behind a moving desk
- Use damaged insulation
- Route low-voltage wire through a mains enclosure
- Leave loose strips where children can pull them
Use certified mains adapters from traceable sellers. For permanent wiring or new outlets, hire a qualified electrician and follow local requirements.
Mount without damaging equipment
Adhesive strips can release under heat or remove paint and display coatings.
- Clean only with a surface-safe method.
- Test adhesive in an inconspicuous location.
- Keep away from labels, vents and screws.
- Add mechanical clips where approved.
- Leave a cable service loop.
- Check the installation after the first warm workday.
Do not stick a strip across a monitor seam or over service openings. Removable channels on the wall or shelf are easier to maintain than adhesive directly on expensive electronics.
Plan smart controls conservatively
Smart lights can provide scenes, schedules and remote control. They also add accounts, cloud services, wireless traffic and software updates.
Prefer:
- A physical on/off control
- Local operation when the internet is unavailable
- Clear update support
- Minimal app permissions
- A separate guest or IoT network when appropriate
- Schedules that do not interrupt calls
An ordinary dimmable lamp is better than an unreliable smart system. Follow the smart-plug safety guide before adding remote switching.
A practical installation sequence
Daylight test
Arrange the desk and screen first. Check reflections in morning and afternoon light.
Ambient layer
Turn on enough room light to navigate and work without the monitor.
Task layer
Add the lamp and illuminate a page at the normal writing position.
Background layer
Add low output behind the screen and increase only until the wall is softly visible.
Camera test
Join a private call preview. Check skin tone, glasses reflections and background brightness.
Evening test
Reduce output and choose a warmer appearance if preferred. Do not let decorative light become the brightest object in view.
Record fixture, cable and power details in the desk project planner.
Common mistakes
Buying RGB strips before white task light. Solve visibility first.
Showing bare LED dots. Hide and diffuse the source.
Using one color temperature claim as a health rule. Choose for task and comfort.
Powering a long strip from an unknown USB port. Match documented requirements.
Blocking monitor vents. Preserve airflow and service access.
Creating new glare. Test reflections from the seated position.
Making the setup app-dependent. Keep physical controls.
Final recommendation
Build the room in order: diffused ambient light, adjustable task light and subtle monitor or shelf background light. Add color only after each work task is easy to see.
Choose dimmable, traceable products with a compatible power supply, hide the emitters and route cables away from moving hardware. Good LED desk lighting is quiet infrastructure—it makes the screen, page and room easier to use without becoming the main event.