Home Office Video Call Setup: Camera, Lighting and Background
Build a professional video call setup with better camera height, lighting, audio, framing, background privacy and a five-minute pre-call check.
What to know first
- Start with the work you do, not the look you want.
- Protect clearances before choosing furniture.
- Spend first on items you touch for hours each day.
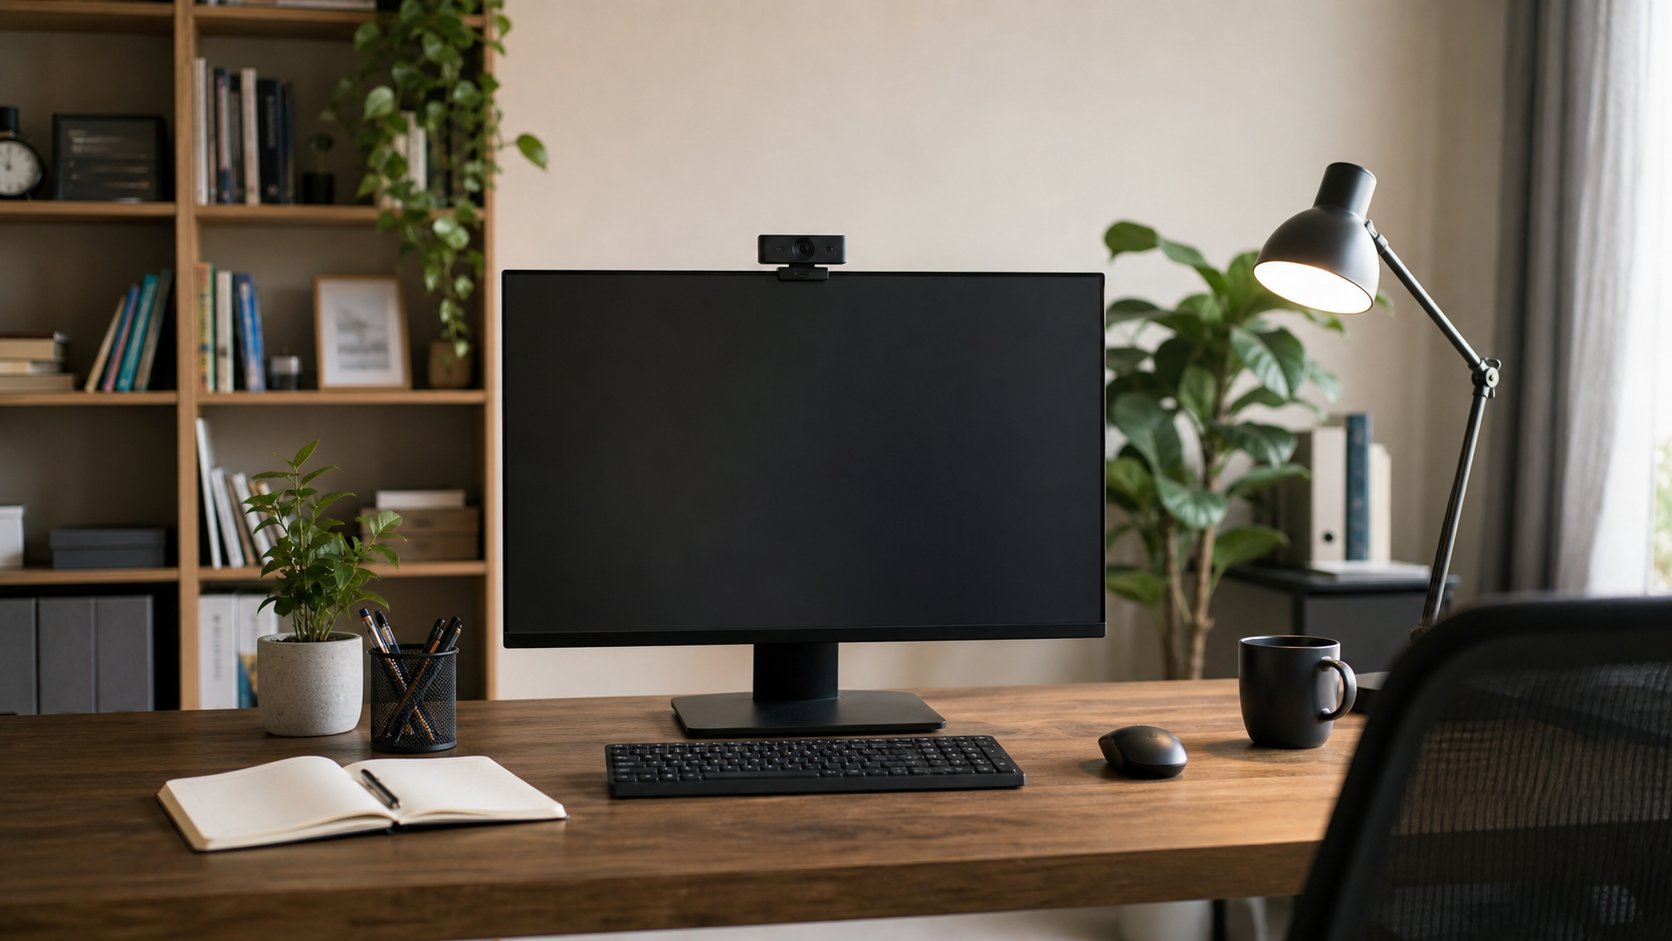
A strong home office video call setup does not require a studio. Put the camera near eye level, light your face from the front or front-side, prioritize clear audio and remove private or distracting items from the frame. Those four changes matter more than a 4K camera.
This guide builds the setup in the right order, from free room changes to useful equipment. It works for Zoom, Microsoft Teams, Google Meet and recorded interviews.
The five-part setup
| Element | Good starting point | Common problem |
|---|---|---|
| Camera | Near eye level, directly ahead | Low laptop angle |
| Framing | Head and upper torso visible | Too much ceiling or extreme close-up |
| Light | Soft source in front or 30–45 degrees aside | Bright window behind you |
| Audio | Microphone close to your voice | Distant laptop mic in an echoing room |
| Background | Simple, intentional and private | Movement, clutter or confidential material |
Improve the weakest element first. For many home offices that is audio or lighting, not resolution.
1. Put the camera near eye level
Place the lens at or slightly above eye level and close to the window where other participants appear on screen. This creates a natural angle and reduces the visible difference between looking at a person and looking into the camera.
For a built-in laptop camera:
- Raise the laptop on a stable stand or firm books.
- Add an external keyboard and mouse for longer sessions.
- Center the laptop rather than leaving it beside a primary monitor.
- Lower the chair only if feet and keyboard position remain supported.
Do not type for hours on a raised laptop without external input devices. The screen and keyboard cannot both be optimally positioned when they are attached.
Use our ergonomic laptop workstation guide for the full arrangement.
2. Frame the shot
Sit far enough from the camera to show your head, shoulders and some upper torso. Leave modest space above the head. Keep the lens approximately centered horizontally.
A practical frame should:
- Show facial expression clearly
- Keep the eyes around the upper third of the image
- Avoid a very wide view of the room
- Leave room for natural movement
- Remain stable when you type
Digital zoom reduces image quality. Move the camera or crop slightly in the meeting application instead.
Look at the lens strategically
Look at the participant window while listening. Look toward the lens when making an important point, greeting someone or answering a direct question. Constant lens contact can feel unnatural and prevents you from reading visual cues.
3. Light the face before buying a new camera
A basic webcam in soft front light often looks better than an expensive camera facing a bright window.
Best free option: face a window
Place the desk so the window is in front of you or 30 to 45 degrees to one side. A sheer curtain can soften direct sun. Avoid rapidly changing light when calls last a long time.
Best lamp position
Place a diffused lamp behind and slightly above the camera, angled toward the face. A 30-to-45-degree side position gives gentle shape without leaving the far side too dark.
If shadows are strong, bounce a second lamp from a pale wall or use a lower-power fill light on the opposite side.
Avoid these lighting problems
- Window behind you: the camera may turn your face into a silhouette.
- Bare bulb in frame: glare distracts viewers and forces poor exposure.
- Only ceiling light: creates eye-socket shadows and forehead glare.
- Mixed extreme color temperatures: one side appears blue and the other orange.
- Light aimed into your eyes: causes squinting and fatigue.
A ring light is optional. Read the ring-light guide before buying one; a shaded desk lamp may solve the same problem.
4. Prioritize audio
People tolerate average video longer than broken audio. Before buying a microphone, improve distance and room acoustics.
Use the closest suitable microphone
A wired or wireless headset usually places the microphone closer than a laptop. A desktop USB microphone can sound good when it is 15 to 30 cm from the mouth and slightly off-axis, but it will also reveal keyboard and room noise if placed too far away.
Built-in laptop microphones can work in a quiet, furnished room when the laptop is directly ahead.
Reduce echo for free
Hard, empty rooms reflect sound. Add ordinary soft surfaces:
- Close curtains
- Put a rug on a hard floor
- Move closer to bookshelves or upholstered furniture
- Close the door
- Keep the microphone away from a bare wall
Do not cover ventilation or create a fire hazard with improvised acoustic materials.
Stop feedback
Use headphones when another participant is audible from speakers near the microphone. If speakers are required, keep volume moderate and select echo cancellation in the meeting app.
Test the selected input and output before an important call. Operating-system updates and docks can change the default device.
5. Build a useful background
A good background is calm, not empty. Aim for one or two layers: a wall, shelf, plant, lamp or simple artwork.
Background checklist
- Remove mail, whiteboards and documents with readable information.
- Avoid showing family photographs without consent.
- Close doors that reveal household traffic.
- Check mirrors and glass for reflections.
- Remove objects that appear to grow from the top of your head.
- Keep bright lights out of the frame.
- Confirm work policies for client-facing calls.
Add distance between you and the wall when space permits. Separation creates visual depth and makes background blur look more natural.
Real, blurred or virtual?
Real background: most stable and natural; requires privacy control.
Background blur: useful for a slightly busy room; may soften hair, glasses or fast hand movement.
Virtual background: useful for approved branding or privacy; requires good edge detection and even lighting.
A green screen is only worthwhile for frequent presentations, recording or strict branded environments. See the green-screen setup guide.
Arrange the desk for calls and normal work
A camera-centered call position can conflict with a dual-monitor work position. Create a repeatable transition.
One-monitor desk
Mount the webcam at the monitor center. Keep the meeting window just below it. Place notes in a narrow column beside the participant window.
Laptop plus monitor
Use the external monitor for normal work. For calls, either center the elevated laptop or put the webcam on the primary monitor and select it manually.
Two monitors
Place the camera on the monitor used for the meeting. Do not read from the other screen while speaking; the head turn looks like disengagement.
If screen sharing, close notifications and place private windows on a different virtual desktop—not merely behind the shared window.
Choose camera settings
Start with automatic exposure and white balance. Lock or adjust them only when the image visibly changes during a call.
Use 1080p when the platform, connection and computer support it. 4K helps with cropping and recording but is rarely necessary for a small meeting tile.
Avoid aggressive sharpening, skin smoothing and artificial portrait effects. They can introduce flicker or edge artifacts.
Match regional lighting frequency settings, often 50 Hz or 60 Hz, if artificial lights create bands. The correct setting depends on local electrical frequency.
Protect privacy and security
- Close the camera shutter when it is not in use.
- Review camera and microphone permissions.
- Keep meeting software and camera firmware current.
- Use approved backgrounds and recording tools.
- Tell participants before recording and follow local consent rules.
- Avoid placing a smart display or camera where it captures private household areas.
- Join confidential meetings with headphones.
A physical shutter controls video but not the microphone. Mute at the application and hardware level when appropriate.
A setup for every budget
Free
- Raise the laptop on stable books for calls
- Face a window
- Use wired earphones with a microphone
- Move clutter and private documents
- Test the meeting app
Modest upgrade
- Stable laptop stand
- External keyboard and mouse
- Adjustable desk lamp with diffusion
- Comfortable USB headset
Frequent-presenter setup
- Reliable 1080p webcam
- Dedicated microphone or high-quality headset
- Soft key light
- Wired Ethernet or stable Wi-Fi
- Repeatable camera and light mounts
Spend on reliability before decorative background lights.
Five-minute pre-call checklist
- Confirm camera, microphone and speaker selections.
- Check lens height and framing.
- Turn on front light and remove backlight.
- Scan the background for private information.
- Close unnecessary applications and notifications.
- Open shared files before joining.
- Connect power for long calls.
- Join early enough to resolve an update.
For interviews or client presentations, make a 20-second recording and listen through headphones. A meter moving does not prove that speech is clear.
Troubleshooting common problems
Face looks dark
Reduce the light behind you, face the window, add a soft front light or lower camera exposure for the background.
Image is grainy
Add light before replacing the camera. Clean the lens with an appropriate cloth and remove digital zoom.
Voice sounds distant
Select the correct microphone and bring it closer. Reduce room echo and speak across, rather than directly into, a desktop microphone.
Video freezes
Stop unnecessary uploads, use wired Ethernet when available, move closer to the router or reduce video resolution. Audio continuity matters most.
Camera angle changes during typing
Use a rigid stand or external webcam mount. Flexible laptop trays often shake.
Background blur cuts off hair or hands
Improve separation and even lighting, reduce fast gestures or use the real background.
Final recommendation
Build your home office video call setup in this order: camera height, front lighting, audio distance, background privacy and connection stability. Test the complete path in the actual meeting application.
A modest webcam at eye level in good light with clear audio looks more professional than an expensive camera placed low in a dark, echoing room. Solve the communication problem, not the shopping list.