Laptop Stand and External Monitor Setup: A Complete Guide
Build a stable laptop-and-monitor workstation with the right screen roles, heights, keyboard position, dock bandwidth, cable slack and closed-lid ventilation checks.
What to know first
- Start with the work you do, not the look you want.
- Protect clearances before choosing furniture.
- Spend first on items you touch for hours each day.
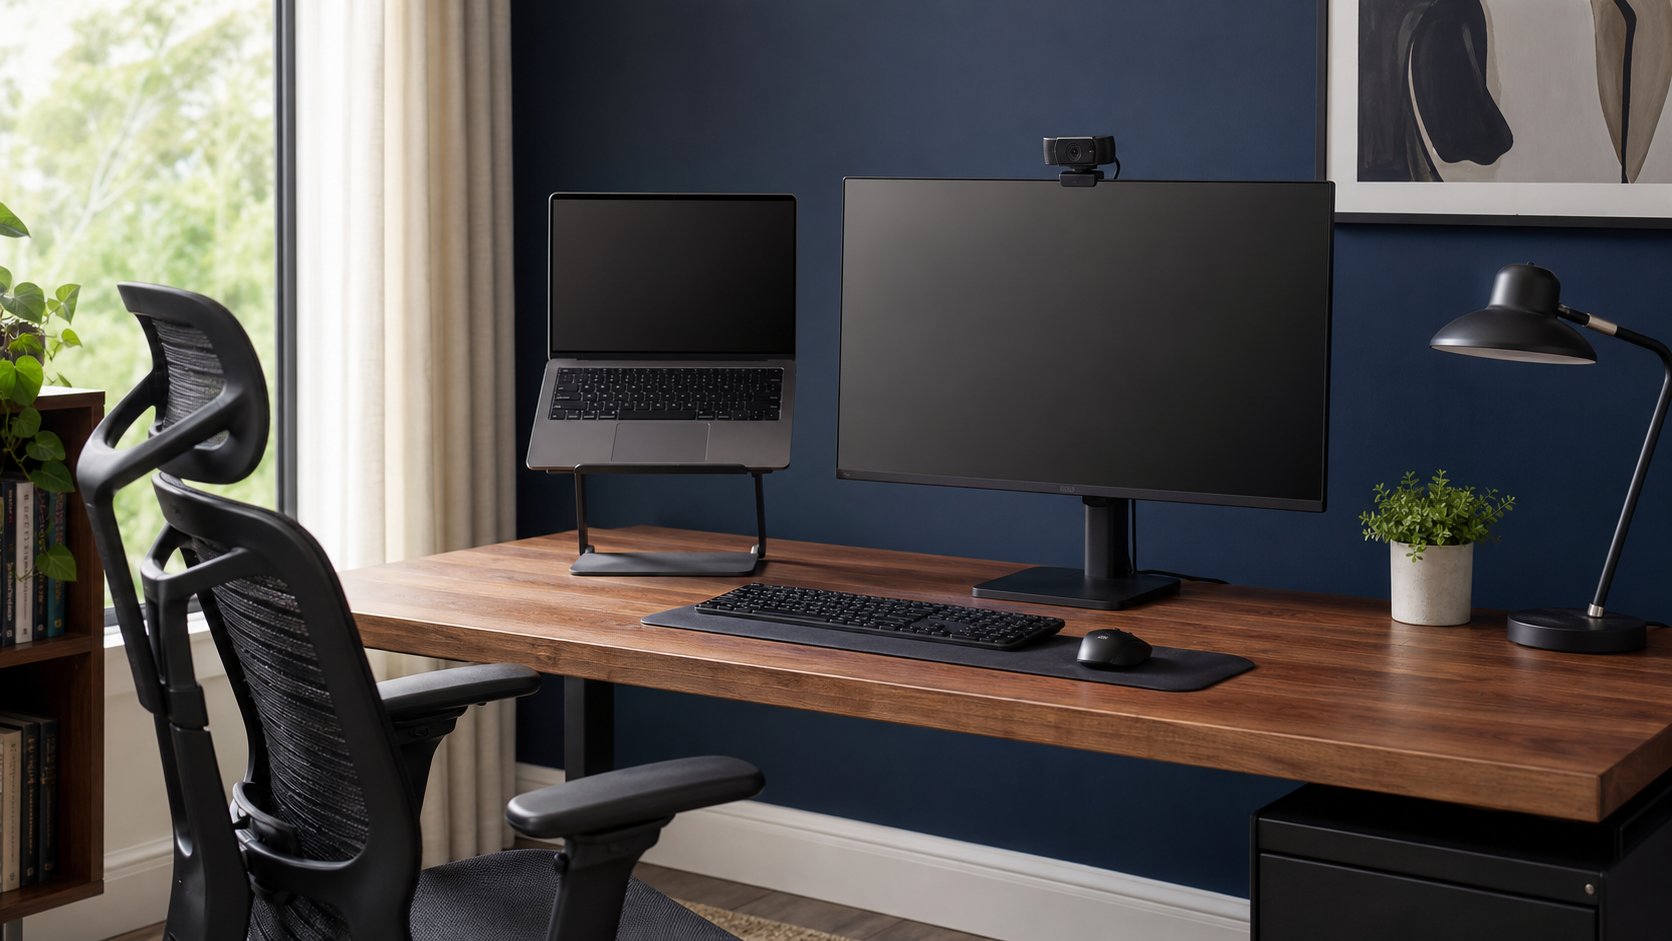
A good laptop stand and external monitor setup separates the screen from the input devices. Center the display used for most work, place its top around or slightly below eye level as a starting point, and keep a separate keyboard and mouse close enough that the shoulders stay relaxed. The laptop can then serve as a secondary screen on a stable stand or run closed if its manufacturer permits that mode and ventilation remains clear.
The stand is only one part of the system. Port bandwidth, charging power, display support, cable reach and the desk’s depth determine whether the setup is comfortable and reliable.
Choose one of three layouts
| Work pattern | Primary display position | Laptop position | Best for |
|---|---|---|---|
| External monitor primary | Centered in front | On stand to one side | Most full-day remote work |
| Equal-use dual display | Bezel gap near body center | Raised beside monitor | Frequent movement between two apps |
| Closed-lid laptop | External monitor centered | Closed in ventilated stand | Small desks and focused work |
If the laptop is the main screen for hours, center it rather than placing it off to the side. The layout should reflect use, not symmetry.
Start with the primary screen
OSHA’s computer workstation purchasing guide recommends that the most-used monitor sit in front of the user and that laptop users have a docking arrangement that allows better monitor placement. OSHA also advises enough desk depth for the screen to sit at least 20 inches away.
Use these as starting points, not rigid medical rules:
- Center the primary display with the keyboard and chair.
- Keep the upper active content near or below eye level.
- Increase text size before pulling a large screen too close.
- Tilt the screen to control reflections, not to compensate for a poor height.
- Make small changes and check comfort over a full workday.
Bifocal or progressive-lens users may prefer a lower screen to avoid tipping the head backward. A clinician or ergonomist can help when symptoms persist.
Decide what the laptop screen is for
A secondary laptop display works best with a defined role:
- Calendar and chat
- Reference document
- Music controls
- Monitoring dashboard
- Video-call participant gallery
Place content that demands sustained attention on the centered monitor. Repeatedly turning toward the laptop for writing or detailed reading defeats the purpose of elevating the main screen.
For roughly equal use, bring both displays close together and center the body near their inner edges. See the dual-monitor setup guide for more layout options.
Pick a stable laptop stand
A stand must support the laptop’s footprint and weight without blocking vents. Check:
- Published weight capacity
- Platform width and front retaining lip
- Hinge resistance
- Rubber contact points
- Vent locations
- Height range
- Base footprint
- Cable clearance
A light portable stand may be adequate for a fixed screen but flex while the laptop is opened. A heavy articulated stand requires more desk depth. Test the stand by gently operating the screen and connecting cables; the computer should not tip or slide.
Do not stack unstable books or boxes where a bump can send the laptop onto the floor. A secure fixed riser is preferable to an adjustable mechanism that cannot hold its setting.
Add a separate keyboard and pointer
Once a laptop is raised, its built-in keyboard is too high and too far away for sustained typing. Use a separate keyboard and mouse or trackball on the desk.
Position them so:
- The keyboard is directly in front of the primary screen.
- Elbows remain near the torso.
- Wrists are not held upward against a thick front edge.
- The pointer is close to the keyboard.
- Frequently used shortcuts reduce reaching.
A compact keyboard can reduce mouse reach, while a split model may improve shoulder and forearm positioning for some users. Compare layouts in the ergonomic keyboard guide.
Align two different screens
Exact physical alignment is not always possible because bezels, stands and panel sizes differ. Prioritize the active content.
- Put the primary display at the comfortable height.
- Raise the laptop until its main content area is reasonably close.
- Angle the laptop inward.
- Match software scaling so text appears similar in size.
- Arrange displays in the operating system to reflect their physical positions.
If the pointer catches at an edge, adjust the virtual rectangles in display settings. Do not raise the laptop so high that its base becomes unstable merely to align the top bezel.
Check display support before buying a dock
A USB-C-shaped port does not guarantee video output, charging or Thunderbolt capability. Consult the laptop manufacturer’s exact model documentation.
Record:
- Maximum external displays
- Maximum resolution and refresh rate
- DisplayPort Alternate Mode support
- Thunderbolt or USB4 support
- Power delivery requirement
- Whether the laptop uses internal graphics limits
- Operating-system restrictions
Some computers support fewer external displays through a single connection than their number of physical ports suggests. DisplayLink-based docks add displays through compressed USB video and require software; they can be useful for office work but are not identical to native display output.
The docking-station guide explains bandwidth and compatibility in more detail.
Select the right cable
Match both ends and the full signal requirement. “HDMI” or “USB-C” alone is not enough.
Confirm:
- Connector type
- Cable version or rated bandwidth
- Resolution and refresh requirement
- HDR or high color-depth needs
- Cable length
- Charging wattage for USB-C
Use certified cables from traceable sellers for higher-power charging and high-bandwidth video. An intermittent display may be a cable problem, but also check the dock, driver, monitor input and laptop firmware before replacing several parts at once.
Open-lid versus closed-lid mode
Open laptop
Advantages: second screen, built-in webcam and immediate access to the keyboard in an emergency.
Trade-offs: more visual complexity, more sideward viewing and a larger footprint.
Closed laptop
Advantages: cleaner layout and fewer screen distractions.
Trade-offs: no built-in camera or emergency controls, and thermal behavior depends on the computer’s design.
Only use closed-display mode when the manufacturer supports it. Keep vents and hinge exhaust unobstructed, connect the recommended power source and observe temperature and performance during demanding work. A vertical stand must grip the chassis without pressing the screen unevenly.
Plan the camera position
If the laptop camera is used, placing the computer far to one side makes eye contact look indirect. Options include:
- Put the laptop directly below the main monitor for call-heavy work.
- Move the video window close to the laptop camera.
- Add an external webcam centered above the main display.
- Use the laptop only for participant thumbnails and look toward the main camera when speaking.
A small light in front and slightly above eye level usually improves video more than an expensive camera in a dark room. Use the video-call setup guide for framing and lighting.
Manage cables for movement and service
Leave a gentle service loop near every movable connection. Route cables so that adjusting the laptop or monitor does not pull on ports.
A reliable sequence is:
- Place all devices at their final positions.
- Connect the shortest practical signal path.
- Move the laptop stand and monitor through their allowed range.
- Add slack at hinges and stand joints.
- Secure cables to the desk, not tightly to fragile connectors.
- Label the dock power supply and high-bandwidth cable.
Do not trap power adapters under a mat or inside a closed cable box without ventilation.
Download the desk accessory fit planner before buying a stand or dock.
Test the complete setup
Run these checks during the return window:
- Wake from sleep with displays connected.
- Join a call while charging.
- Transfer a large file through the dock.
- Test the target resolution and refresh rate.
- Confirm audio enters and leaves through the intended device.
- Unplug and reconnect once.
- Use the computer under a typical heavy workload.
- Check that cables remain cool and secure.
Update laptop, dock and monitor firmware only from official sources and follow power-loss precautions.
Common mistakes
Centering the gap when one screen is primary. Center the main display instead.
Typing on an elevated laptop. Add separate input devices.
Buying a dock by port count. Verify host bandwidth and display support.
Ignoring closed-lid ventilation. Follow the laptop maker’s guidance.
Forcing exact bezel alignment. Match active content and text scale first.
Using a high laptop camera from the side. Center an external webcam or rearrange for calls.
Securing every cable tightly. Leave service loops for adjustment.
Final setup recipe
For most remote workers, center a 24- to 32-inch external monitor, place the laptop on a stable stand to the side as a reference screen, and use a separate keyboard and pointer aligned with the main display. Connect through a dock only after verifying the laptop’s display and power requirements.
The “perfect combo” is not a particular stand and monitor. It is a layout in which the primary work stays in front, inputs remain close, ports operate within their limits and every device can move without straining a cable.